Here’s How To Bleed Brakes By Yourself
Source: Pixabay
Bleeding your brakes is a necessary maintenance procedure to keep your vehicle working at its best. It helps keep the fluid level stable and checking the lever and bleeding the brake system will give you a better idea of where your brake system is in its overall health.
It can be a time consuming task, but the good news is that it shouldn’t need to be done all that often. While it’s certainly easier to accomplish this task with at least one other person, here’s how to bleed brakes by yourself.
What is Brake Fluid?
The brake fluid in your car is activated when pressing down on the brake pedal. When you press down on the brake it activates a plunger in the master cylinder, which then pumps brake fluid through the lines to the actual brakes. The fluid squeezes the brake discs and moves the brake shoes into place with the brake drums for a gradual slow down.
Brake fluid is engineered to last for a few years and is essential to the health of the brake system. While you shouldn’t have to replace this on an annual basis, it can break down over time and its moisture resistance will start to ingest small volumes of water, reducing the brake system’s performance and can potentially corrode the main components of the system.
NOT JUST FOR CAR SHOPPING
The CoPilot app isn’t just for buying a car - our new CoPilot for Owning tool will help you keep track of recalls and gives you advice on which scheduled maintenance tasks are most important.
Why Should You Bleed Your Brakes?
Replacing the fluid at regular intervals is an easy way to ensure that you’re driving in a stable car, and it will also save you money on costly brake replacements in the future.
Bleeding your brakes are an essential aspect of removing brake fluid to keep your vehicle healthy. This basically involves removing trapped air from the braking system, as well as some of the old fluid. Completely removing the fluid is a prolonged process but not always necessary.
Bleeding brakes by yourself can be done at home (it’s a bit easier with a second pair of hands) in a handful of steps, so follow these steps below for a guideline.
Steps on How to Bleed Breaks by Yourself
Step 1. Your owner’s manual is the first place to start. It will tell you what kind of braking fluid your model needs, and typically the amount that the manufacturer recommends. Brake fluid can come in a few different varieties and it’s best not to mix them if possible. Once you know what fluid to buy, you’ll typically need between 24 and 36 ounces to successfully manually bleed your brakes.
Step 2. Like most mechanical jobs, you’ll need a set of jack stands to elevate your vehicle. It works best on a flat surface like a garage or driveway. Since you’ll be working from underneath, it must be safely on firm ground when in the air so you can crawl underneath the vehicle at that step in the process. You’ll want to remove the tires from each .. so the fluid can be released easily.
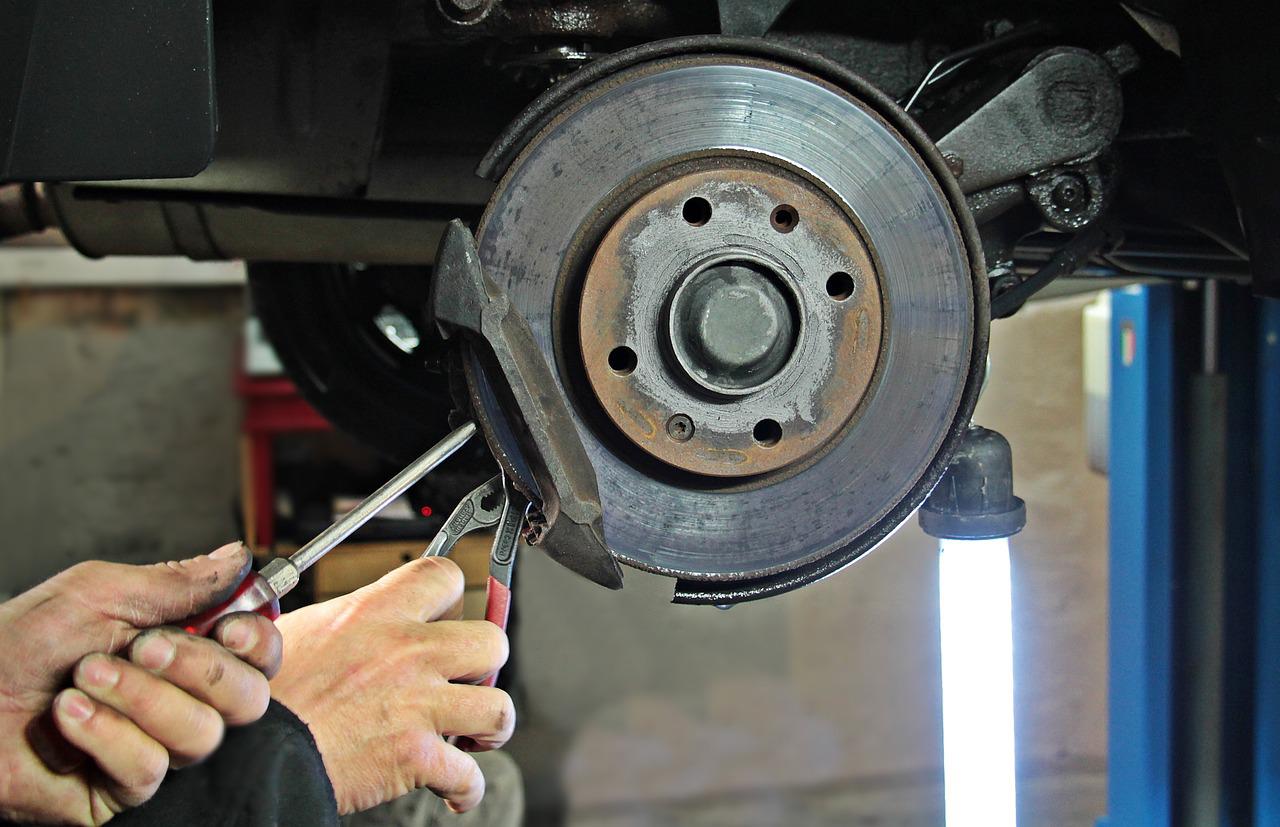
Step 3. Once your vehicle is securely elevated, you’ll want to look for the caliper bleeding screws. Some drum brakes have bleeder screws and may be a bit trickier to loosen, but will start to give after being brushed with oil. It’s important to do one at a time for the bleeding to work effectively. Air bubbles are not good whatsoever for a brake system and they make the brake pedal sound mushy and reduce the system’s effectiveness so be sure to tighten them back properly to avoid this.
Step 4. You should find the fluid volume under the hood in the master cylinder reservoir. If you’re not familiar with the exact location the owner’s manual will show you where it is. Check to see if you have the proper fluid for your engine and if it’s below the marked level add more as needed. The cap for the master-cylinder should be unscrewed but still in place atop the reservoir during brake bleeding. A good rule to follow is that the brake farthest from the master cylinder should be bled first, but can depend on the vehicle. The owner’s manual should direct you with which brake to start with if it specifies.
Step 5. Once you locate the first brake that you’ll bleed, place an end of a strip of clear or transparent tubing around 14 inches in diameter on top of the bleeder screw with the other end into a catch container like an old water or 2 Litre bottle. Make sure the tubing is long enough to hang the capture jar above the bleeder screw’s height to avoid catching air bubbles.
THE BEST CARS FOR COLLEGE STUDENTS
Whether you’re squeezing into a tight campus parking spot or hauling ten loads of laundry back home, these best cars for college students will get you, your friends, and your stuff where you’re going.
Step 6. This is where it starts to get tricky if you’re trying to figure out how to bleed brakes by yourself. This will take several attempts since you don’t have another pair of eyes underneath the car, but with the motor off, gradually start applying pressure to the brake pad to pump the system. You’ll need to check the pressure of the brakes below, and when it starts to feel like pressure is building, switch to gradually pressing the accelerator.
Step 7. If you have something with a decent amount of weight (think small walking dumbbells, dictionary, etc.) this would be a great time to lay it on the brake so you can open the tube on top of the bleeder screw. The tube will gradually fill up with fluid as long as there is pressure on the brake.
Step 8. You’ll need to do this a handful of times (up to 10 depending on how many trips you need to take to and from the brake pedal) to make sure the tubing is completely free of air bubbles.
Step 9. Assuming you started with the brake furthest from the system, you can continue to do steps 5 through 8 on each remaining brake to complete the bleeding process.
Step 10. When you’ve finished bleeding all four pedals, it’s time to hold the brake pad all the way to the floor for a few seconds and then let off suddenly. You’ll need to jump up to the master cylinder tank to check for air bubbles. If you see them, you’ll need to repeat the process to remove the remaining ones. A minor increase in air bubbles can wreak havoc on the fluid balance and create additional problems down the road.
Step 11. To start finalizing the process, make sure all of the bleeder screws are re-tightened. It’s a fine line, but you want them to be secured but not too tight that you can’t loosen them or cause them to pop off. Once you start adding the vehicle’s wheels you can gradually tighten each one.
8 QUESTIONS TO ASK WHEN BUYING A USED CAR
So you’re in the market for a used vehicle? We’ve gone ahead and prepped some essential questions to ask when buying a used car.
One of the main reasons people typically have an additional pair of hands is for convenience. While we outline how to bleed brakes by yourself, it will take a few additional steps for you to complete the process alone.
For accuracy it never hurts to have someone help with vehicle maintenance, but since that may not always be a possibility, this is a good guideline to follow if you’re doing it solo.
Get a Curated List of the Best Used Cars Near You
The CoPilot car shopping app is the easiest way to buy a car. Tell us what you’re looking for and we’ll search the inventories of every dealership in your area to make you a personalized list of the best car listings in your area.
Only looking for newer models? CoPilot Compare is the search engine for nearly-new cars. Only see cars five years or newer with low mileage — CoPilot Compare is the best way to find off-lease, early trade-in, and CPO cars.
The best part? CoPilot is built using the same technology that dealerships use to buy and sell their inventories, so we have more info on each vehicle than competitors. CoPilot doesn’t work with dealerships, so there are no sponsored posts or other shady practices — just the most info on the best cars. Check out our About Us page to see how CoPilot works.